PATTERN CARD
PATTERN CARD
DESIGN A CARD WITH A PATTERN INSPIRED BY A NATURAL FORM

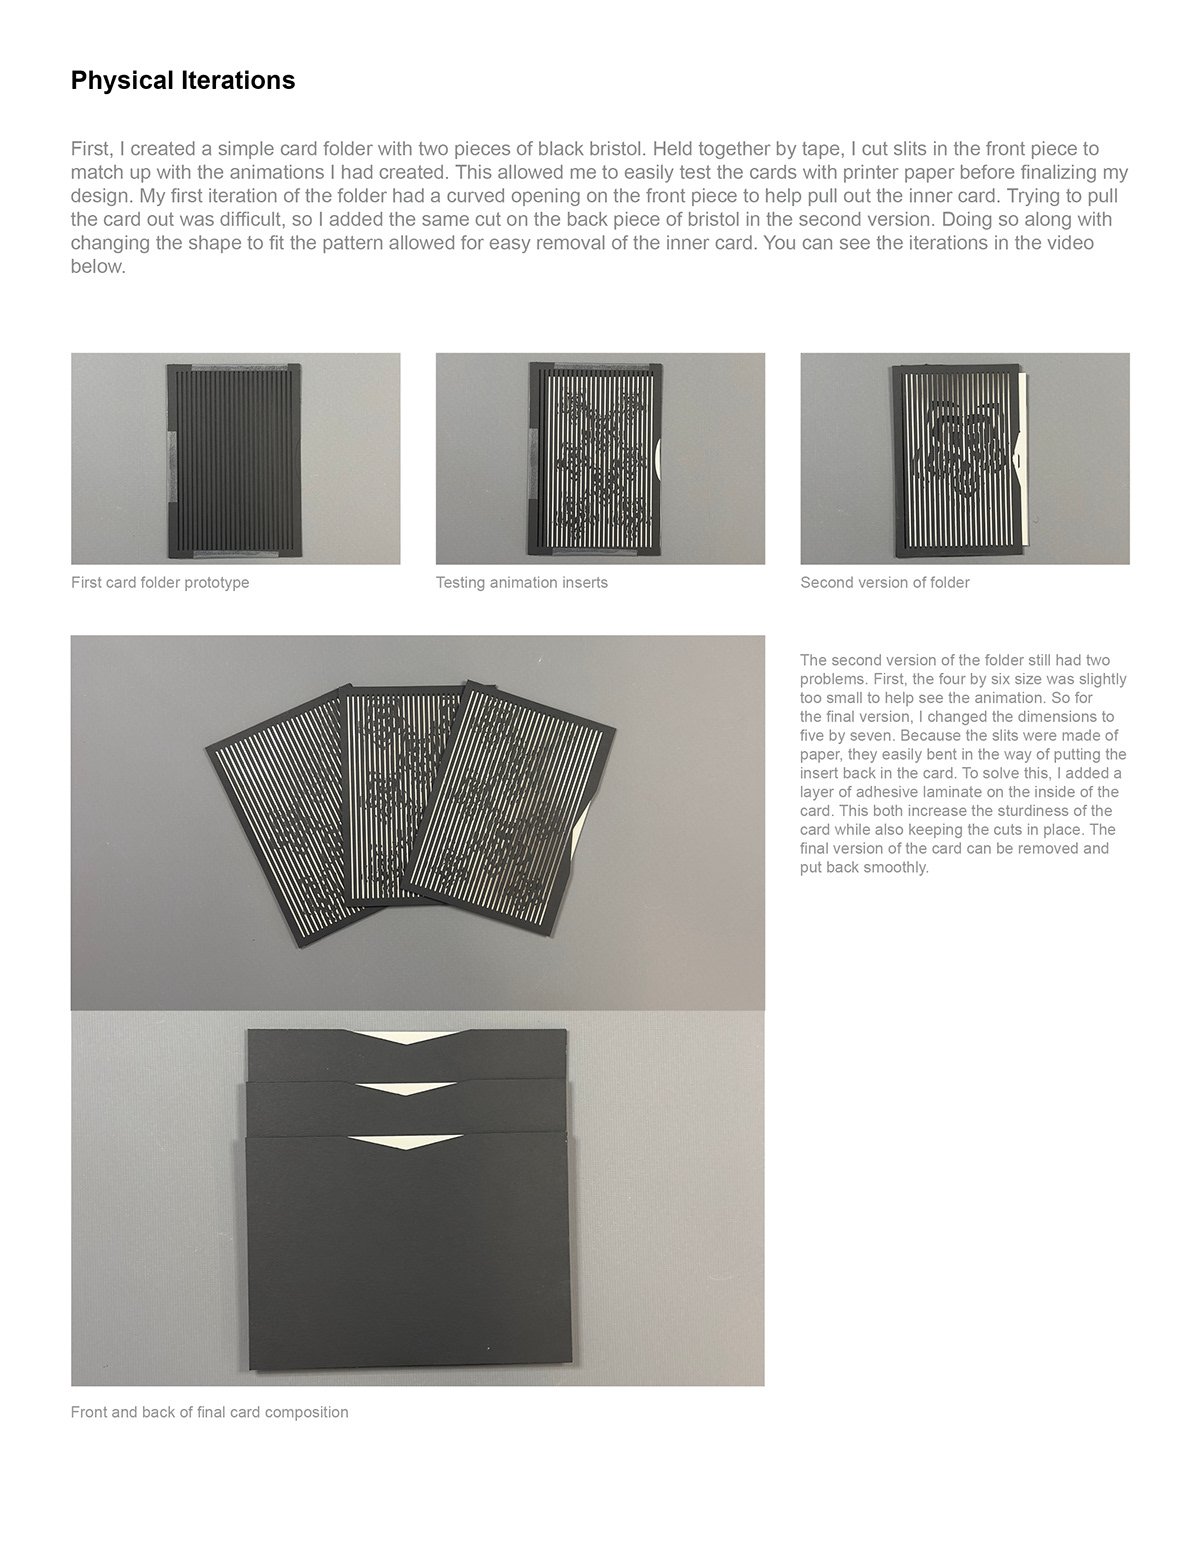
CARD DEVELOPMENT
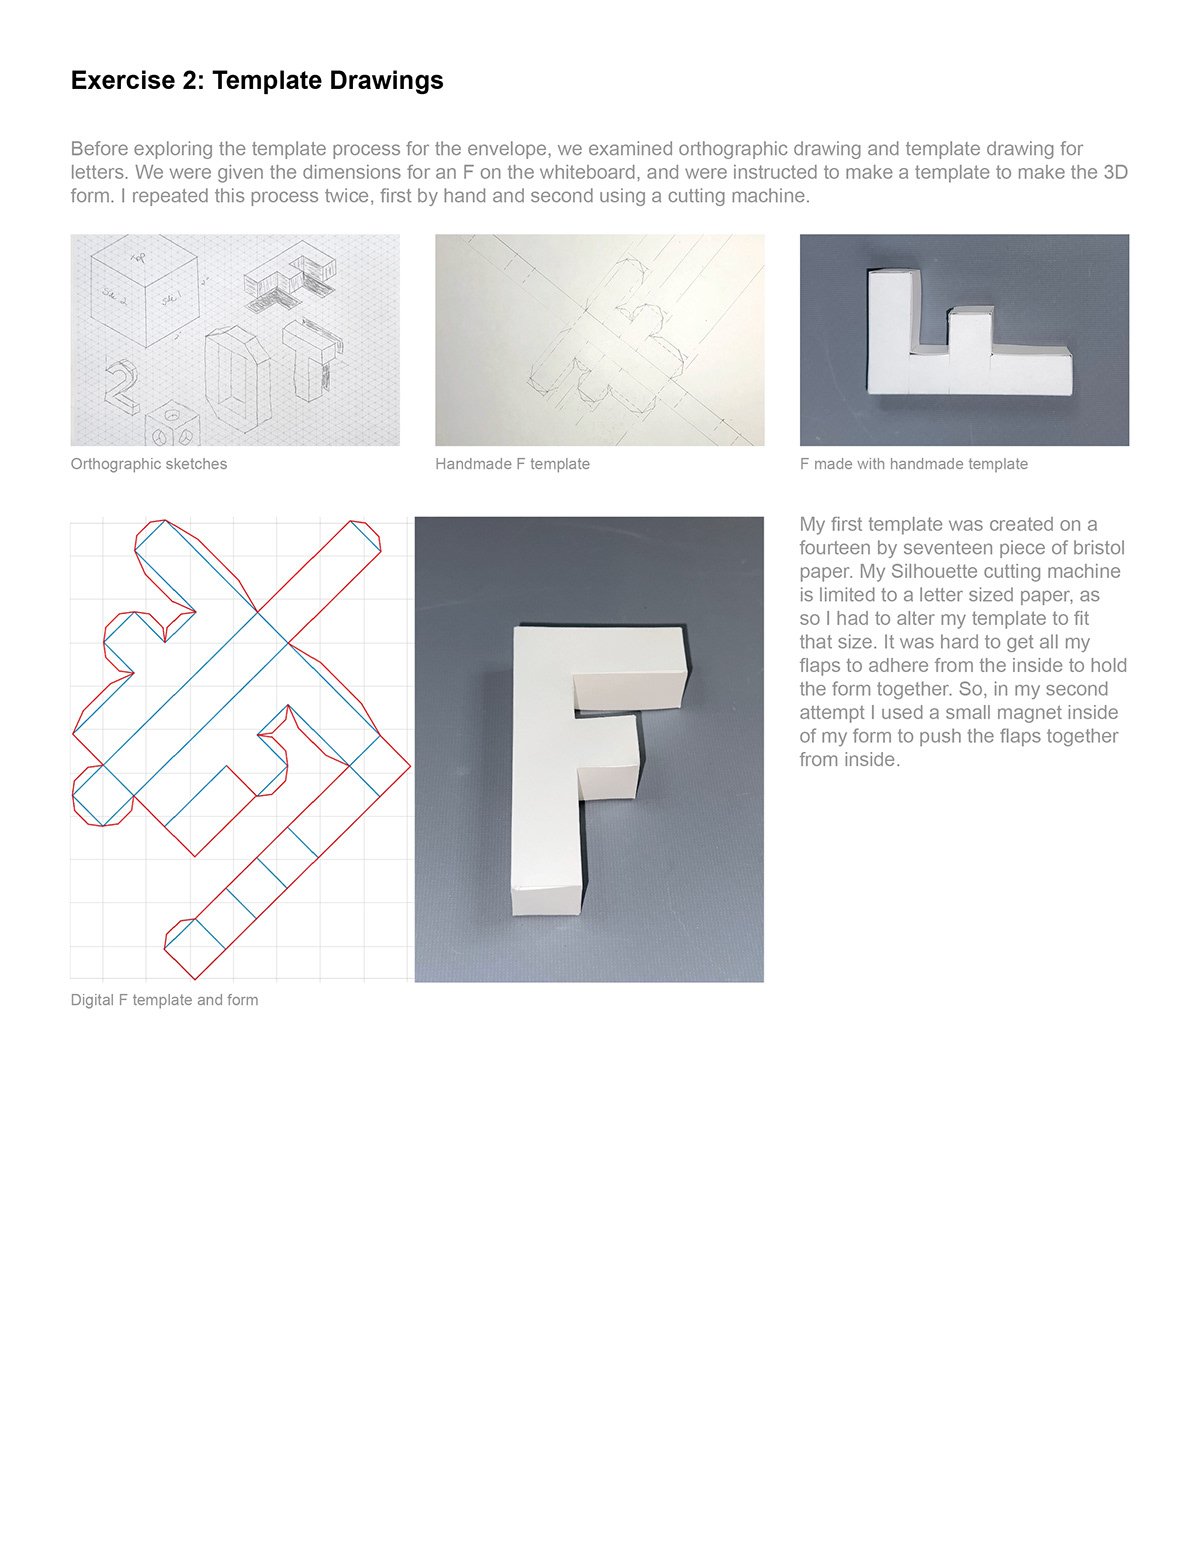
Project Description
This project took the fundamental principles of design that were learned in Module 1 and applied them to pattern making. Module 2 requires analyzing the shapes, lines, and movement in natural forms. Combining these patterns with the principles creates even more compelling and visually interesting patterns. The pattern is required to be in black, white, and greyscale to focus on the shapes rather than color theory. As an advancement, color can be added to another iteration of the card. Following the creation of the pattern, the project moves from 2D applications to 3D in the form of a card. The final card composition extends the pattern to a form using card stock and bristol papers. On top of having a pattern, the card is also meant to be functional. The card both has space to write on and can be shipped through the US mail. It is also not limited to any holiday or event, allowing the card to be used by anyone. Using either digital or analog methods, the cards are produced as editions: three if made by hand or five if digital. The construction of the card allows for the learning of new tools, such as Cricut machines and stamping devices.
Statement
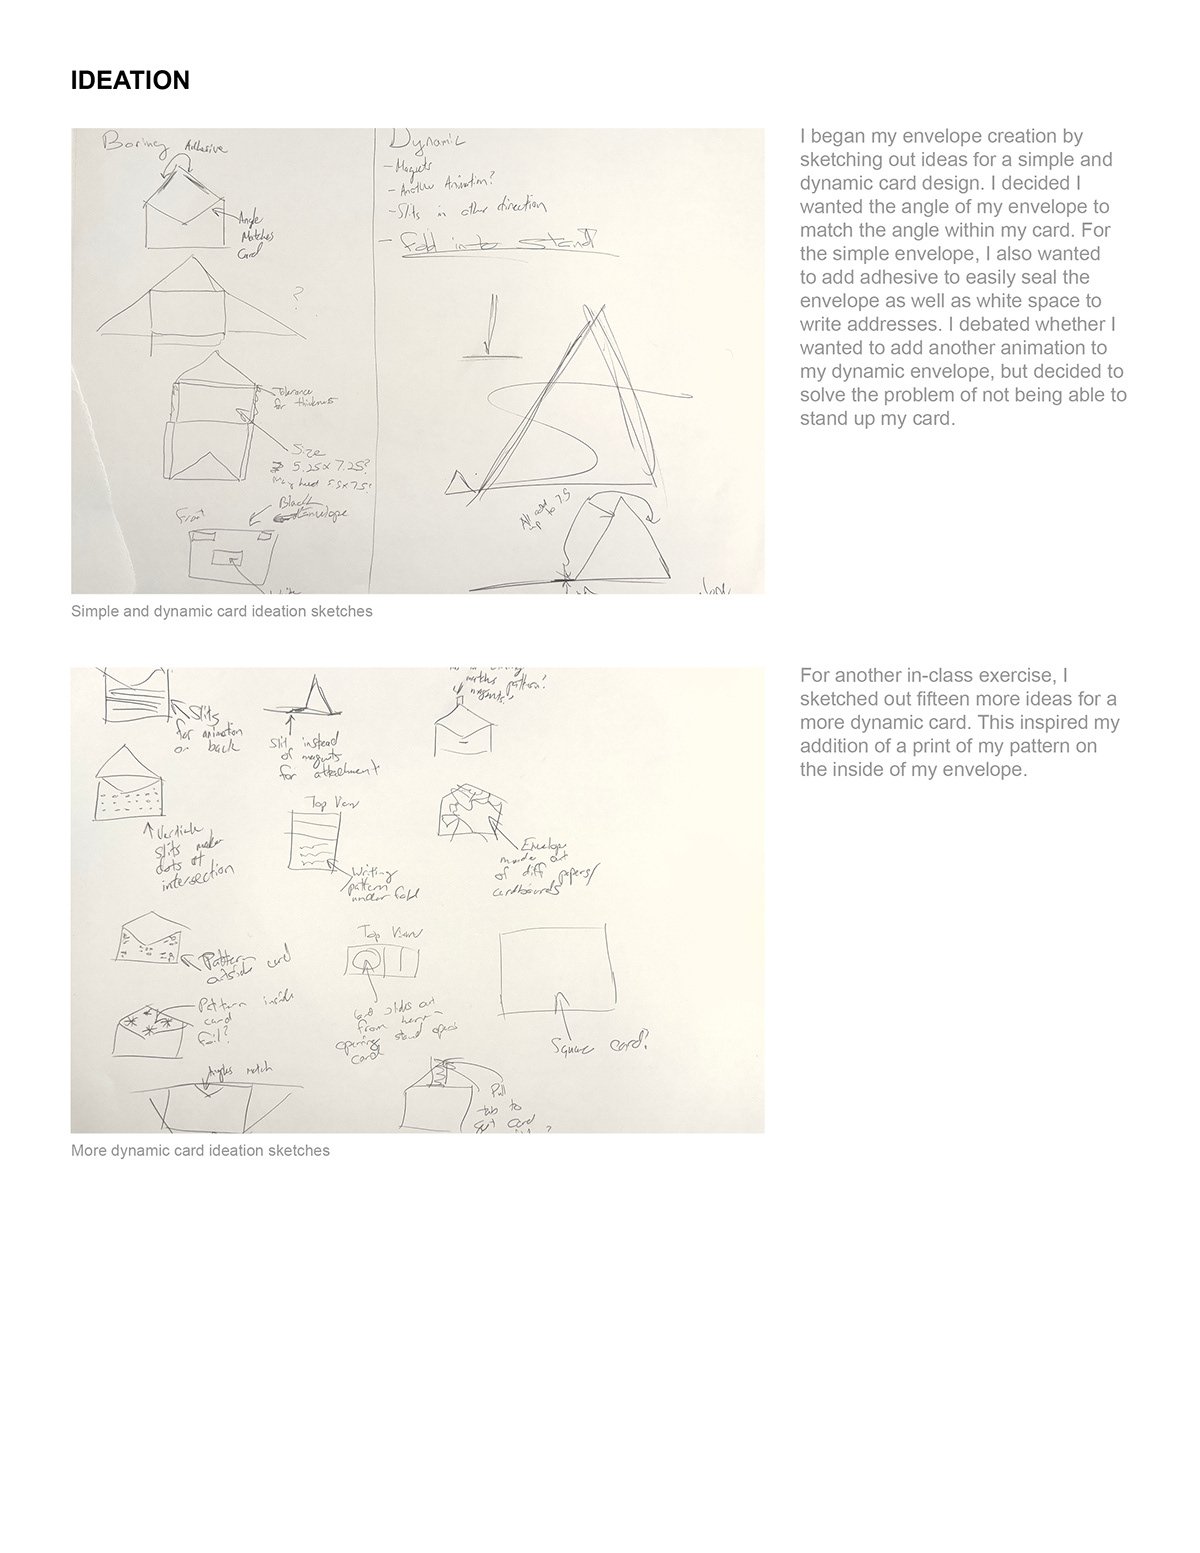
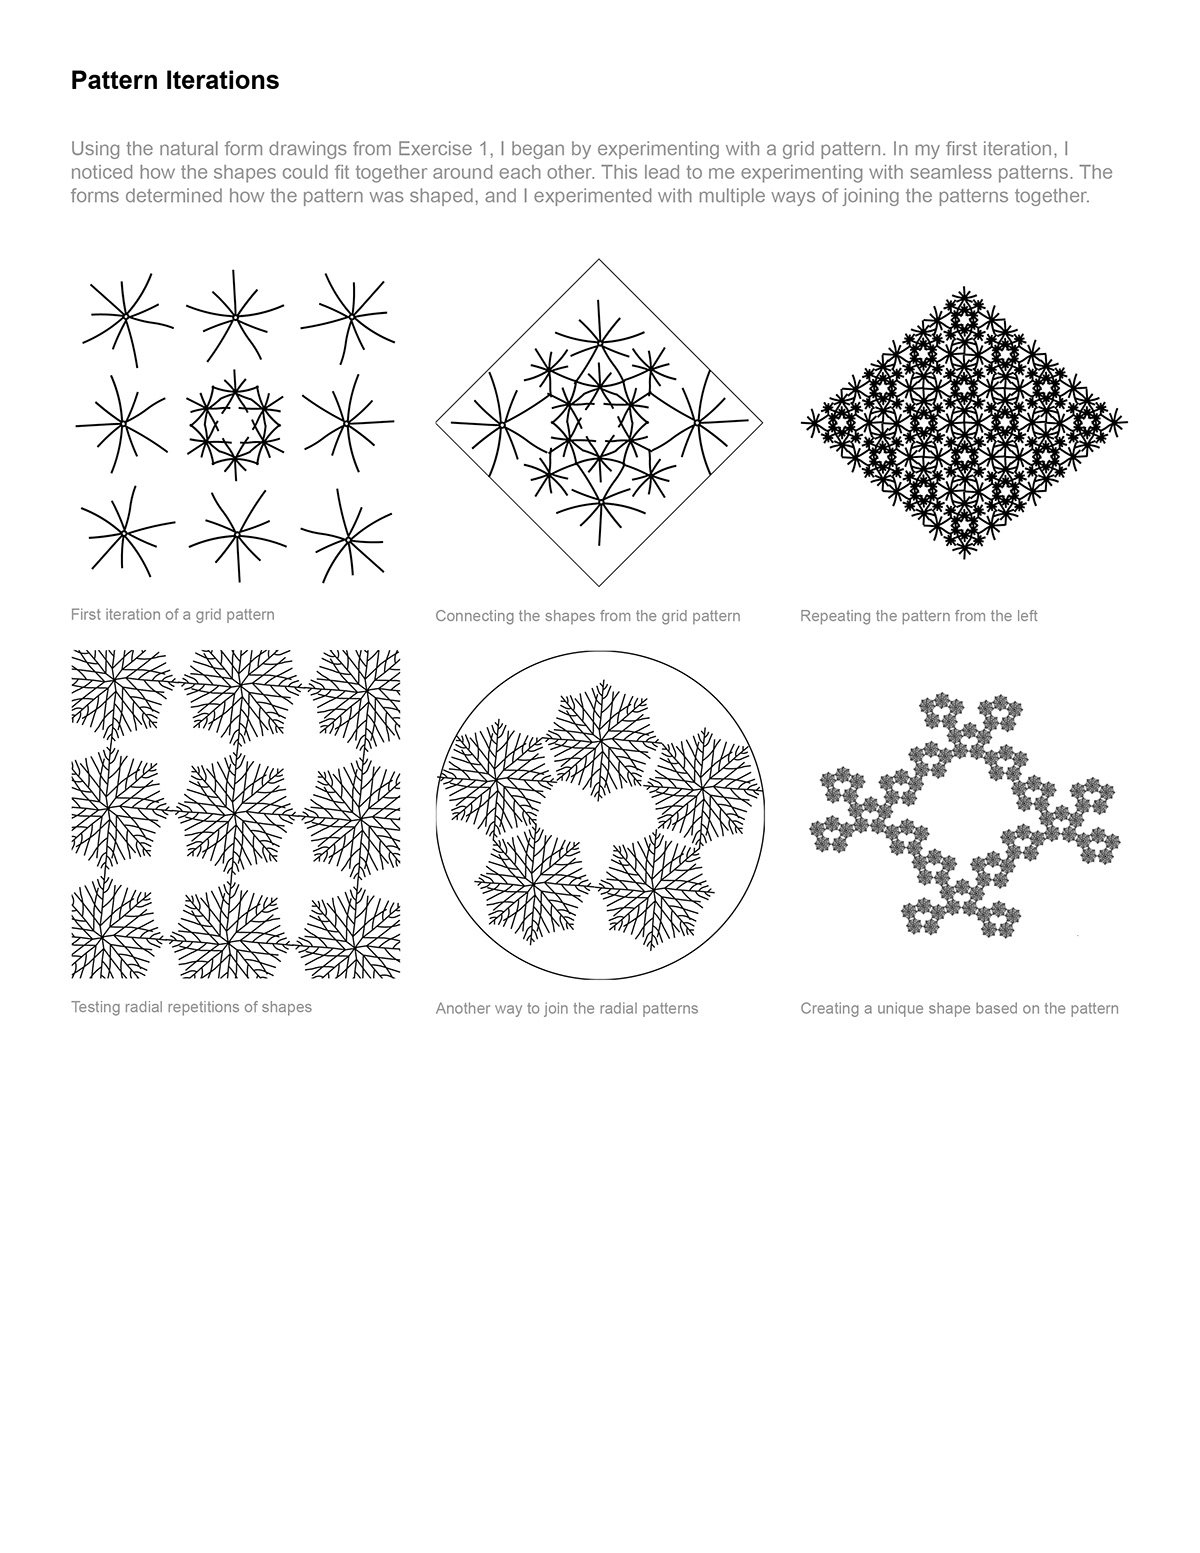
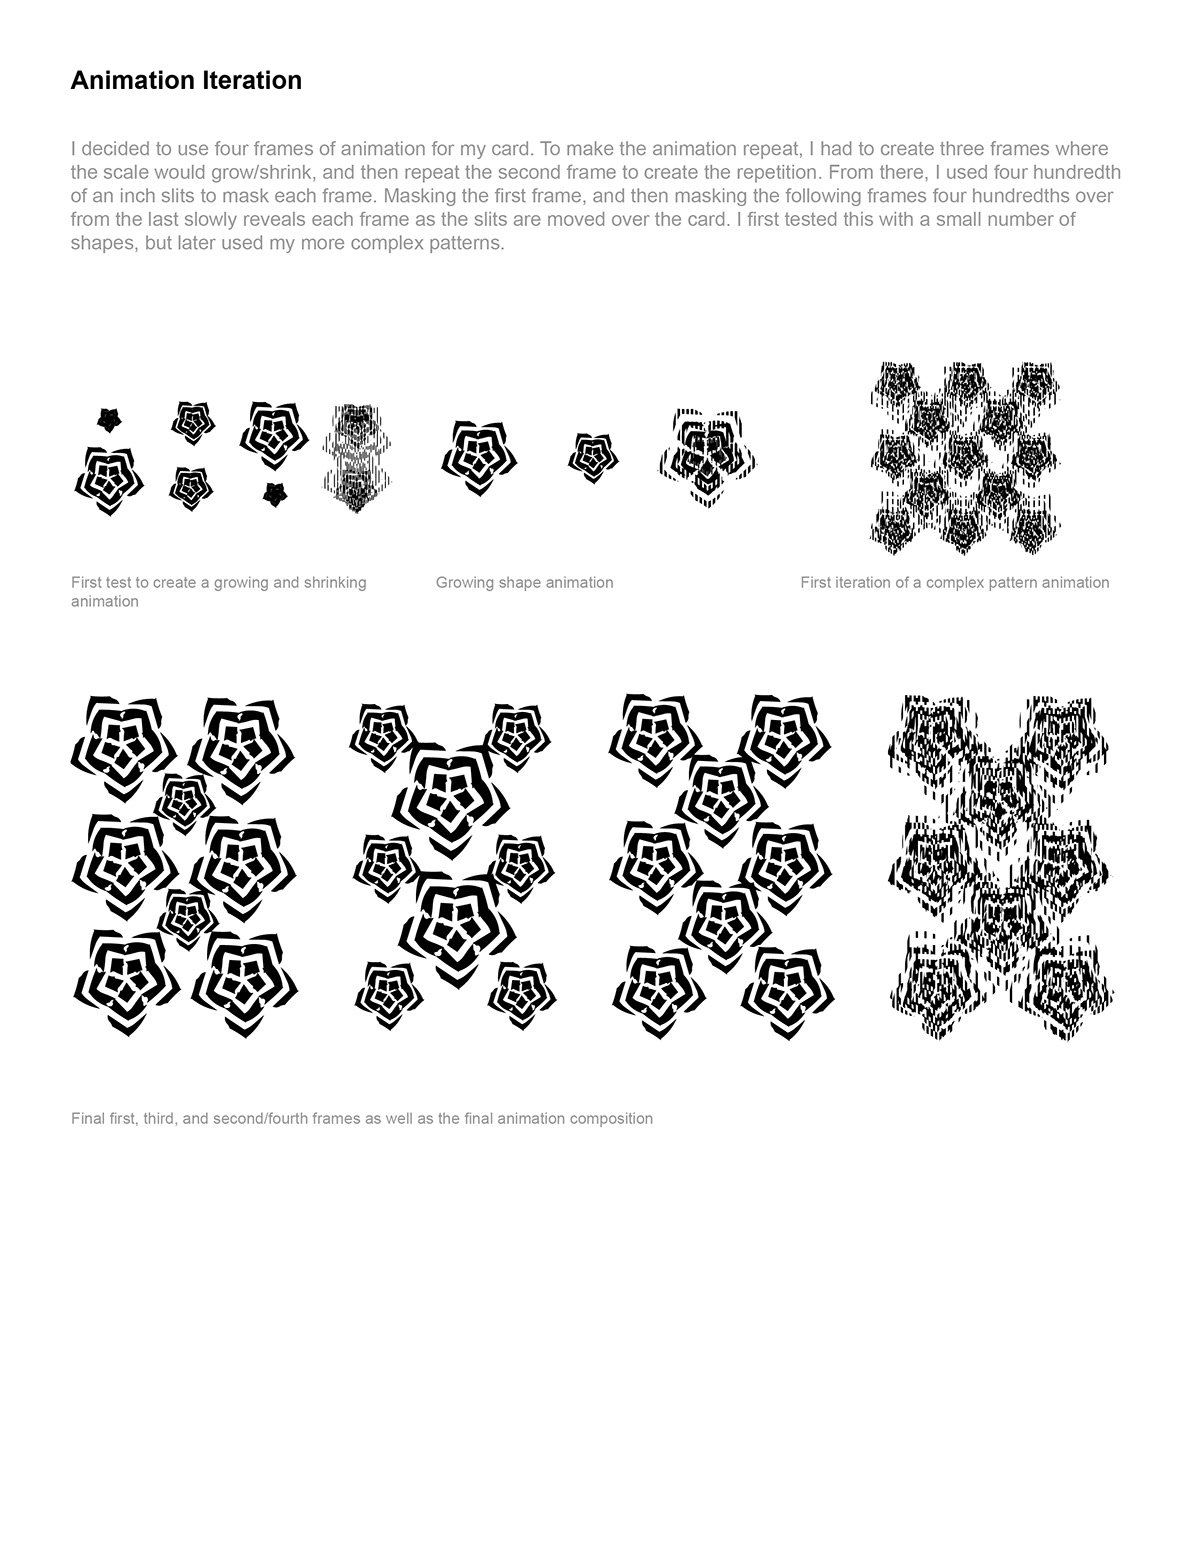
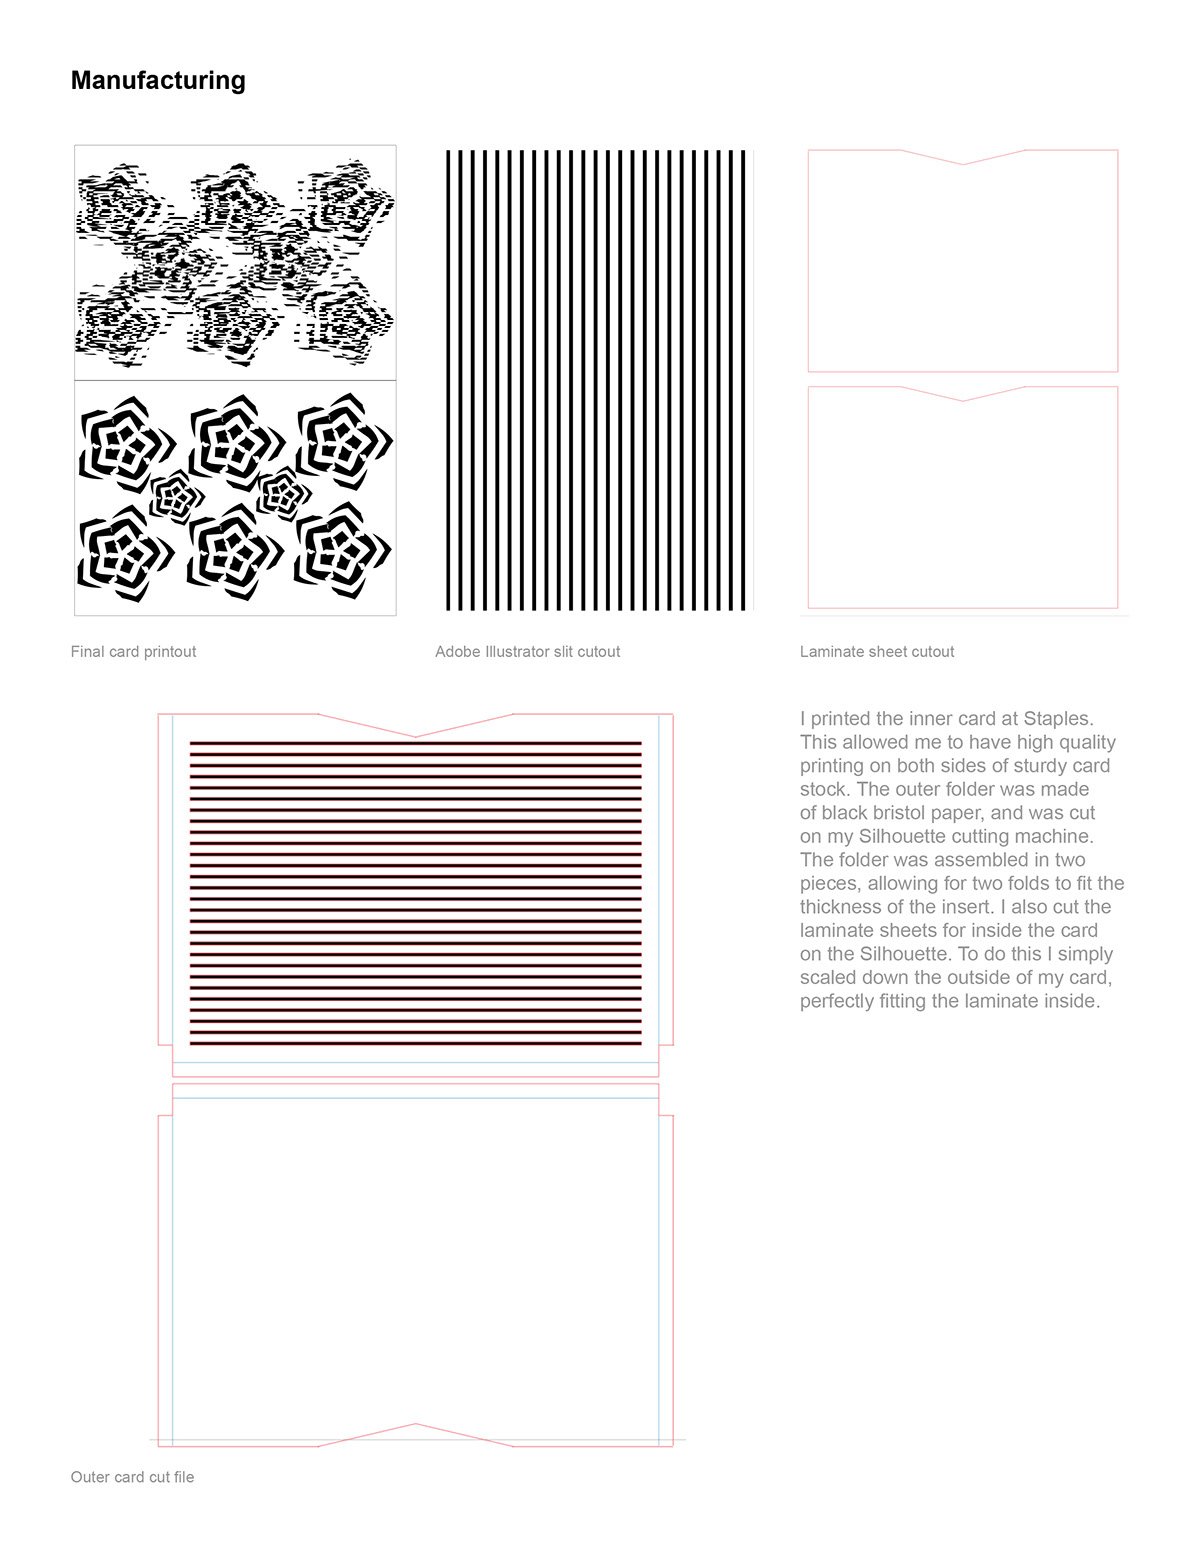
I began by analyzing photos I took of natural forms to find patterns. Having many unique shapes to test the grid and seamless pattern-making methods with gave me a great starting point. I began with iterating using grid methods, using symmetry, I quickly began to notice how the shapes could fit together more seamlessly. This led to the development of multiple patterns. In choosing my final pattern, I had to consider how the pattern would interact with my final form. I had the idea of animating the pattern using slit-style animations. This allows for the pattern to change as the viewer pulls it out of the card. This influenced my decision on the final pattern, as I needed to have something simple enough to view through the slits. While considering this, the scale also became the defining principle in my pattern. The animation allowed me to show the change in scale of multiple objects on the pattern. Using slit animation also limited me to a black and white composition. Once I finalized the pattern as well as how the animation worked, I had to transfer them from digital to physical form. I tested multiple forms of card stock for the outer slit envelope and printed the pattern and altered the animated pattern on white card stock for the inside. For the final composition, I repeatedly tried multiple sizes and methods for constructing the card, until I had a durable and easy-to-use design.

ENVELOPE DESIGN
ENVELOPE DESIGN
Project Description
This assignment requires focusing on the transition between two and three dimensional design. The final composition is in the form of an envelope for the cards made in Assignment 2. Continuing to focus on essential principles such as balance, harmony, and pattern making, the envelopes should feel like an extension to the card design. To create the final template, we explored both hand and digital drawing techniques. As advancements, we could also explore color, dynamic versions (in terms of materials or movement), and creating a container for our final cards and envelopes. Just like the envelope, the container repeated the elements of design to harmonize with both of the other products. The final outcome is a edition of the envelopes and containers, to go with the edition of cards made in Assignment 2.
Statement
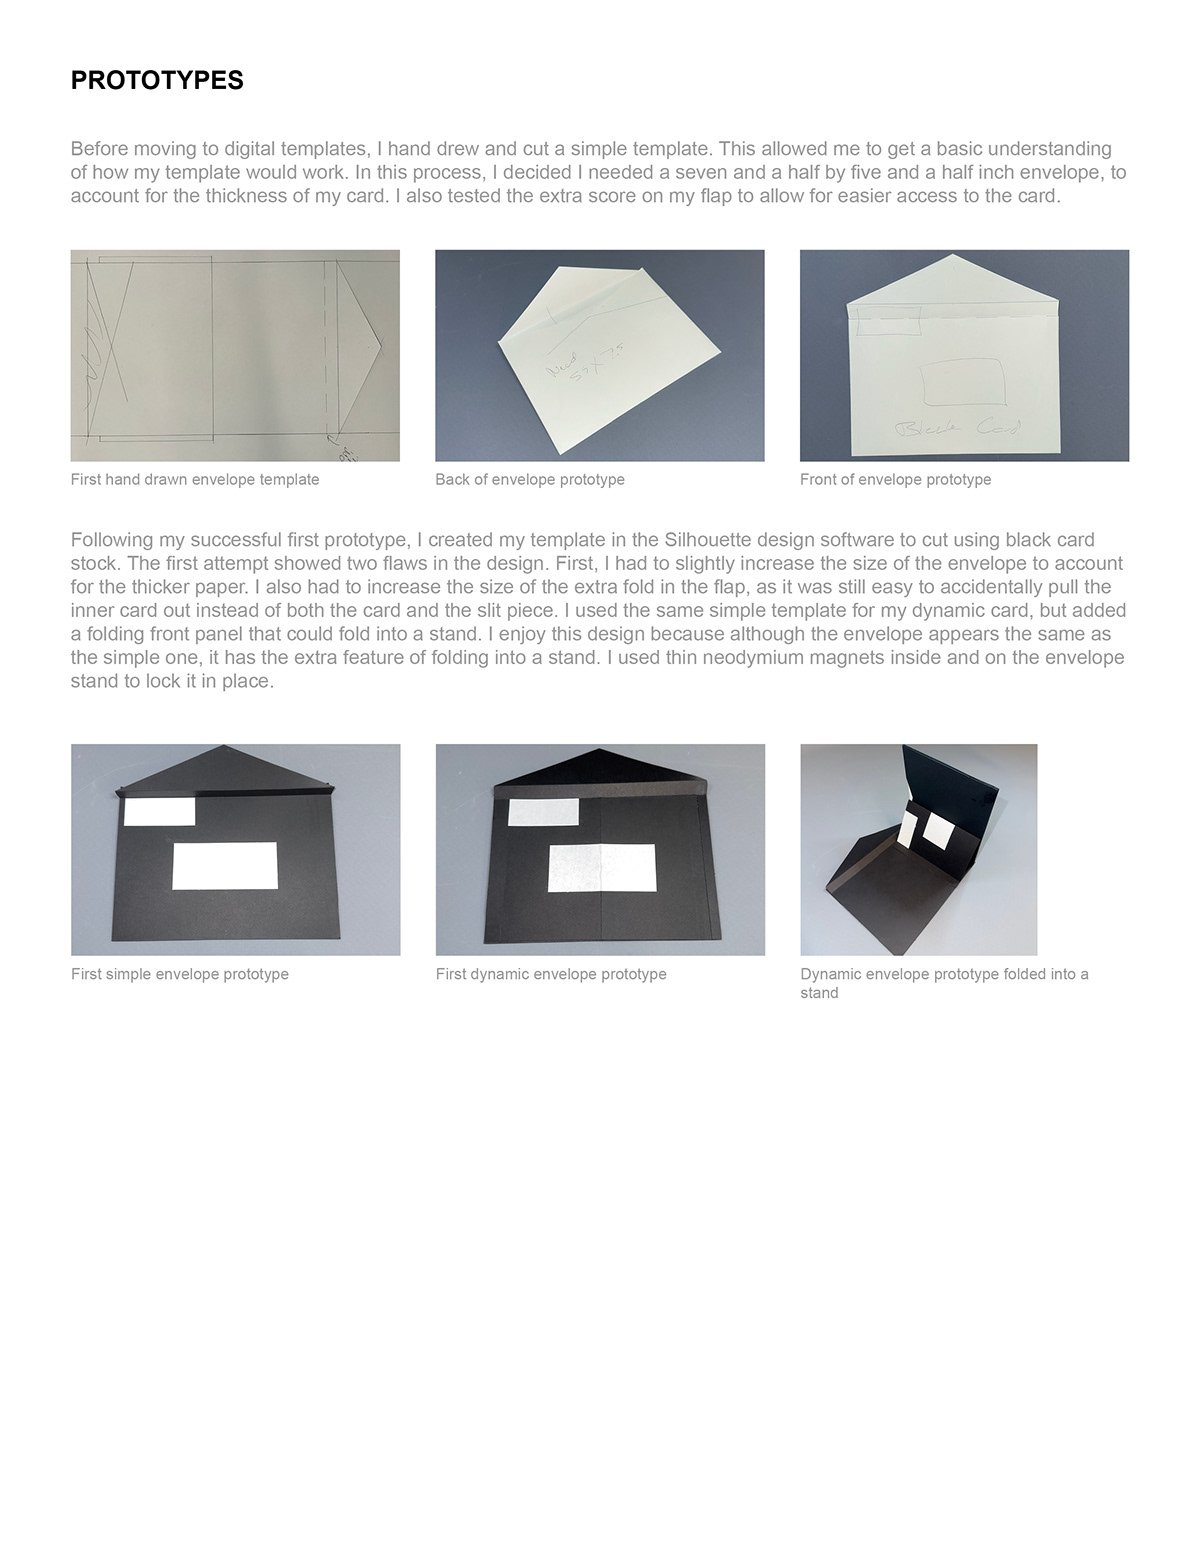
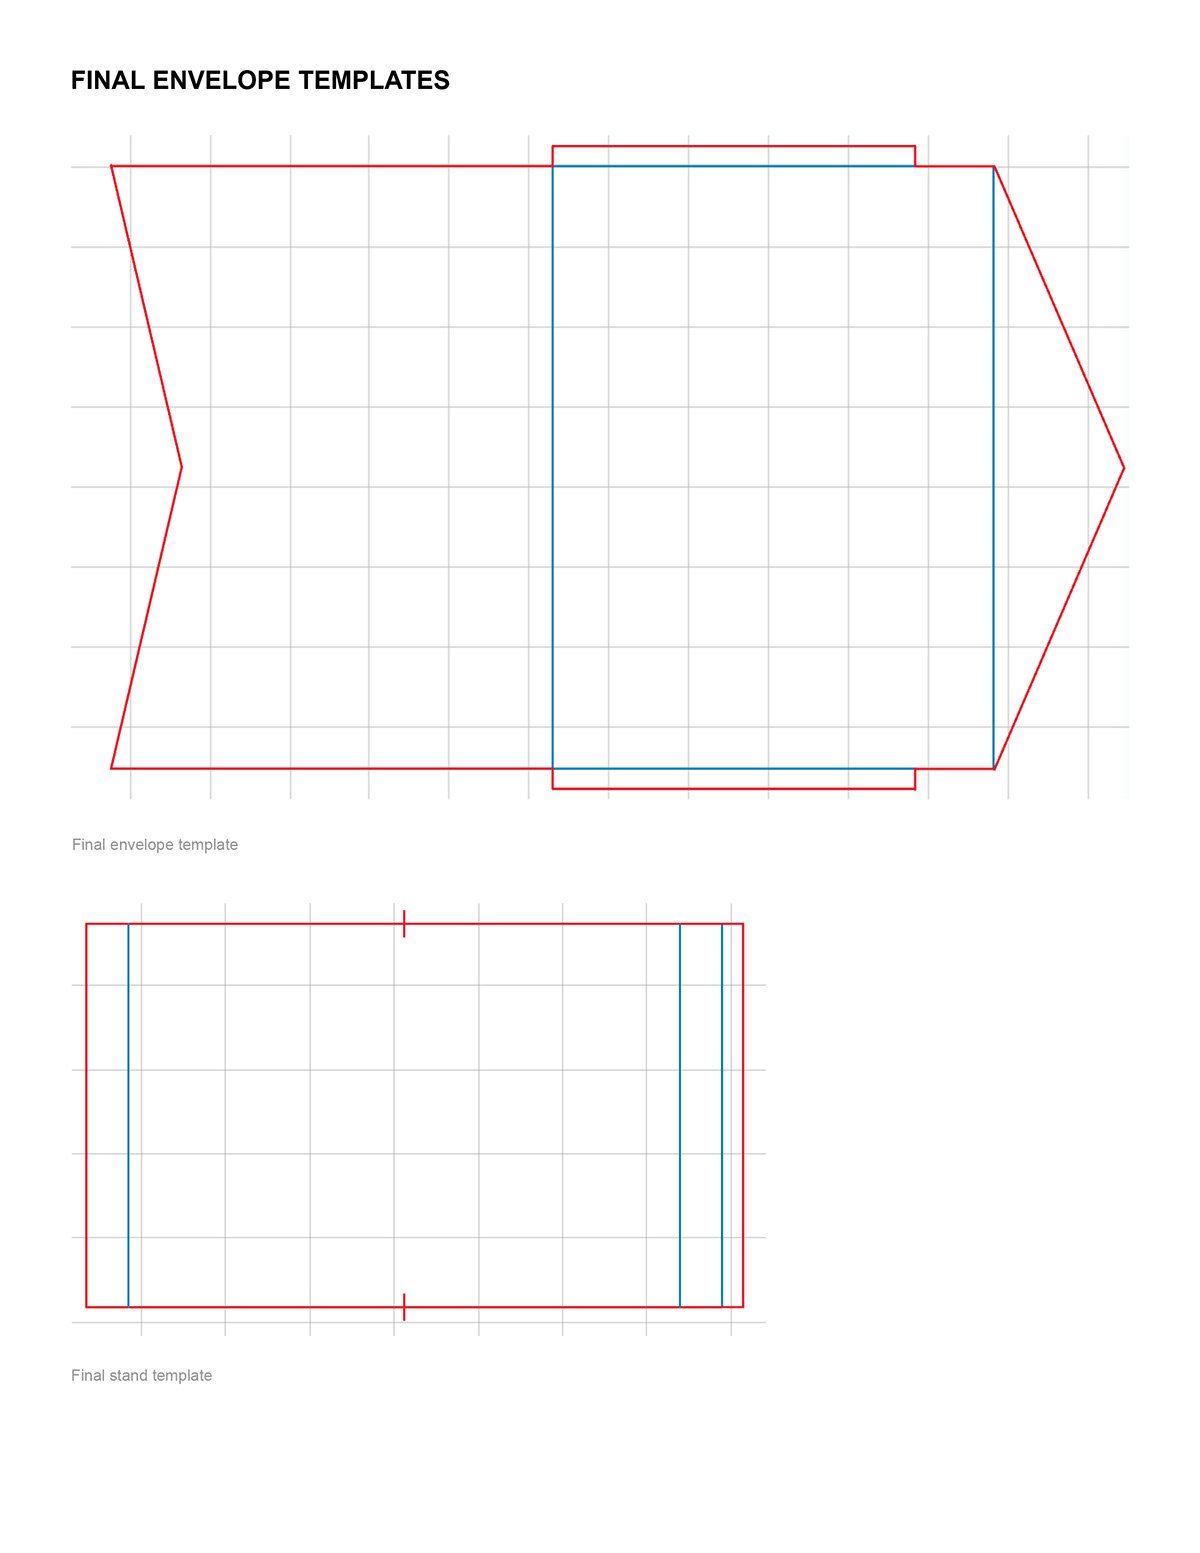
Observing my card design, I noticed that the triangular opening to pull out the card could match the angle on a envelope. I decided to use this main feature to harmonize my card with my envelope. Beginning with hand drawing a template, I was able to create a basic version of my envelope to test the sizing and other features I wanted. First, I noticed that I would need to add an extra fold to the flap of the envelope, to allow easier access to pull the entire card out and not just the insert. Second, I decided to create my final card out of black card stock, and to add white rectangles where writing was required to be to mail the card. I designed my final simple envelope template digitally, and it cuts out in one fold-able piece.
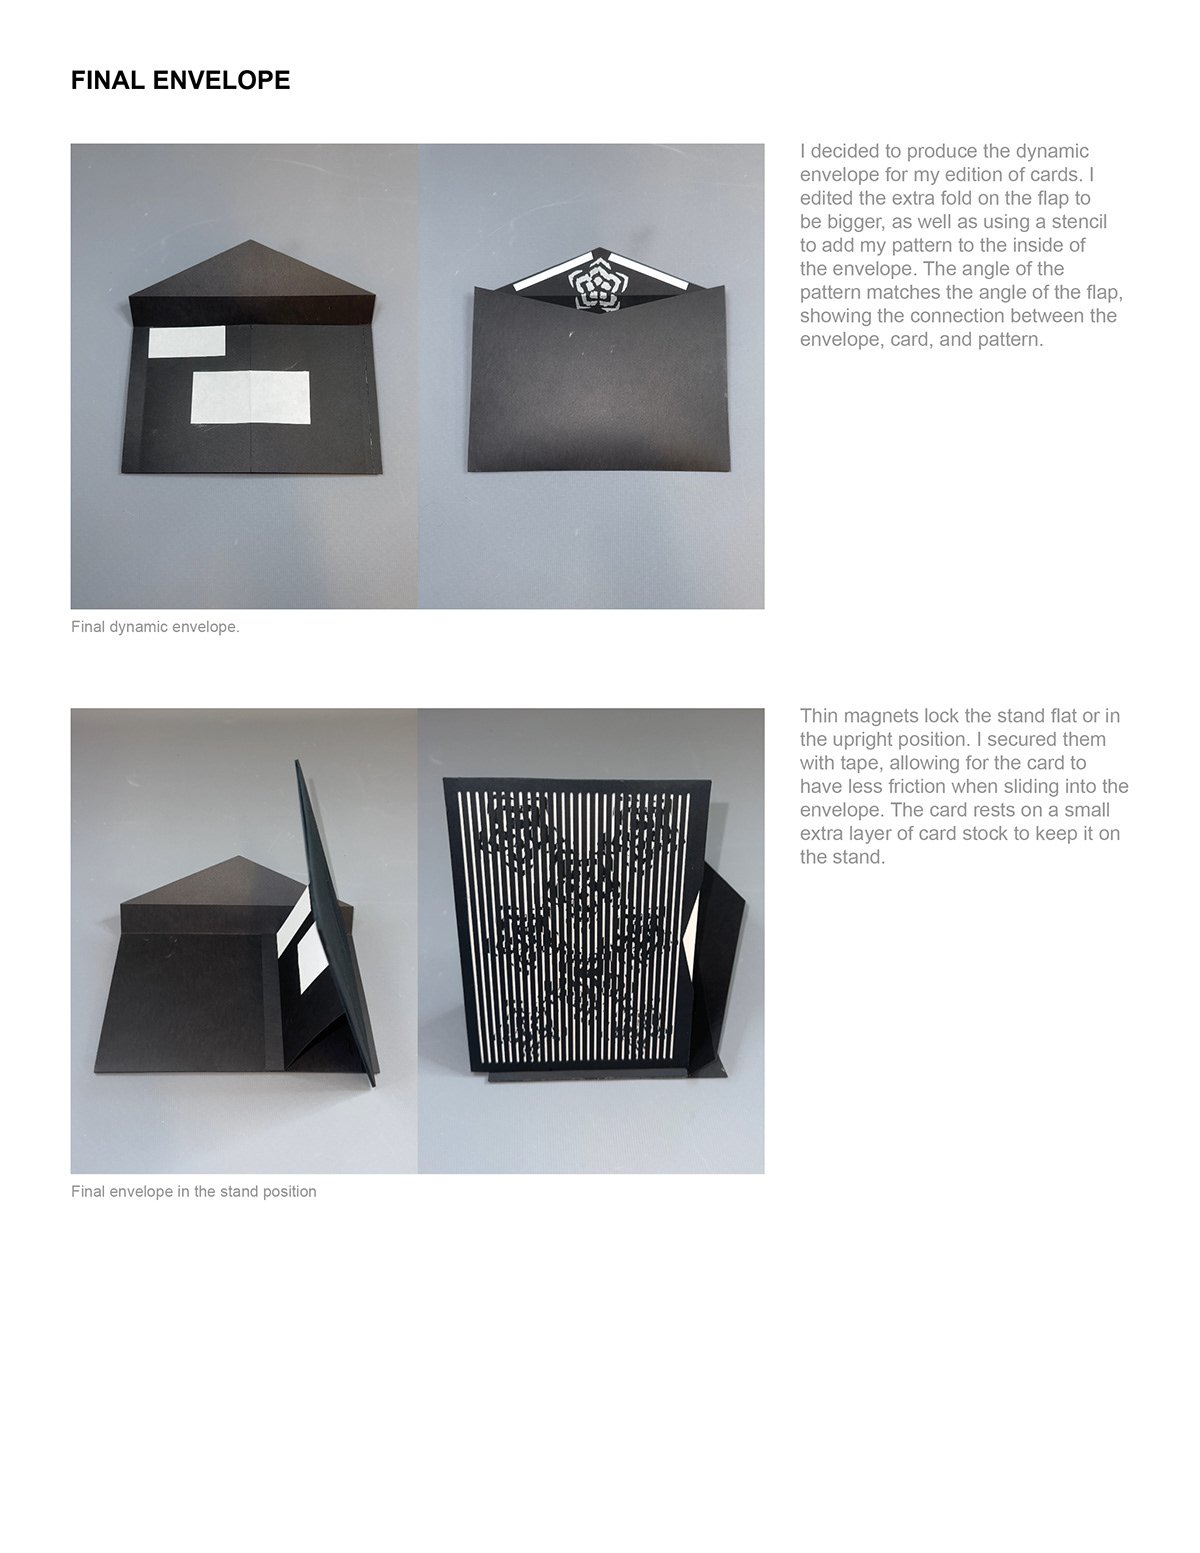
As an in-class exercise, we examined how we could create a more dynamic version of our envelope. I immediately thought of a problem I had not addressed in my card design, being able to stand up the card. I decided to use my envelope as a base for a stand. Testing multiple ways the card could fold, I decided to add a front panel that could fold in a triangular shape to create a stand. Adding magnets to this panel and inside the card allows it to lock flat and in an upright position. This design made it into my final iteration of my card, as the envelope still appears and functions as normal. For the final iteration, I also used a stencil and silver Sharpie to ink a copy of the flower design into the envelope, matching the angle of the flap.
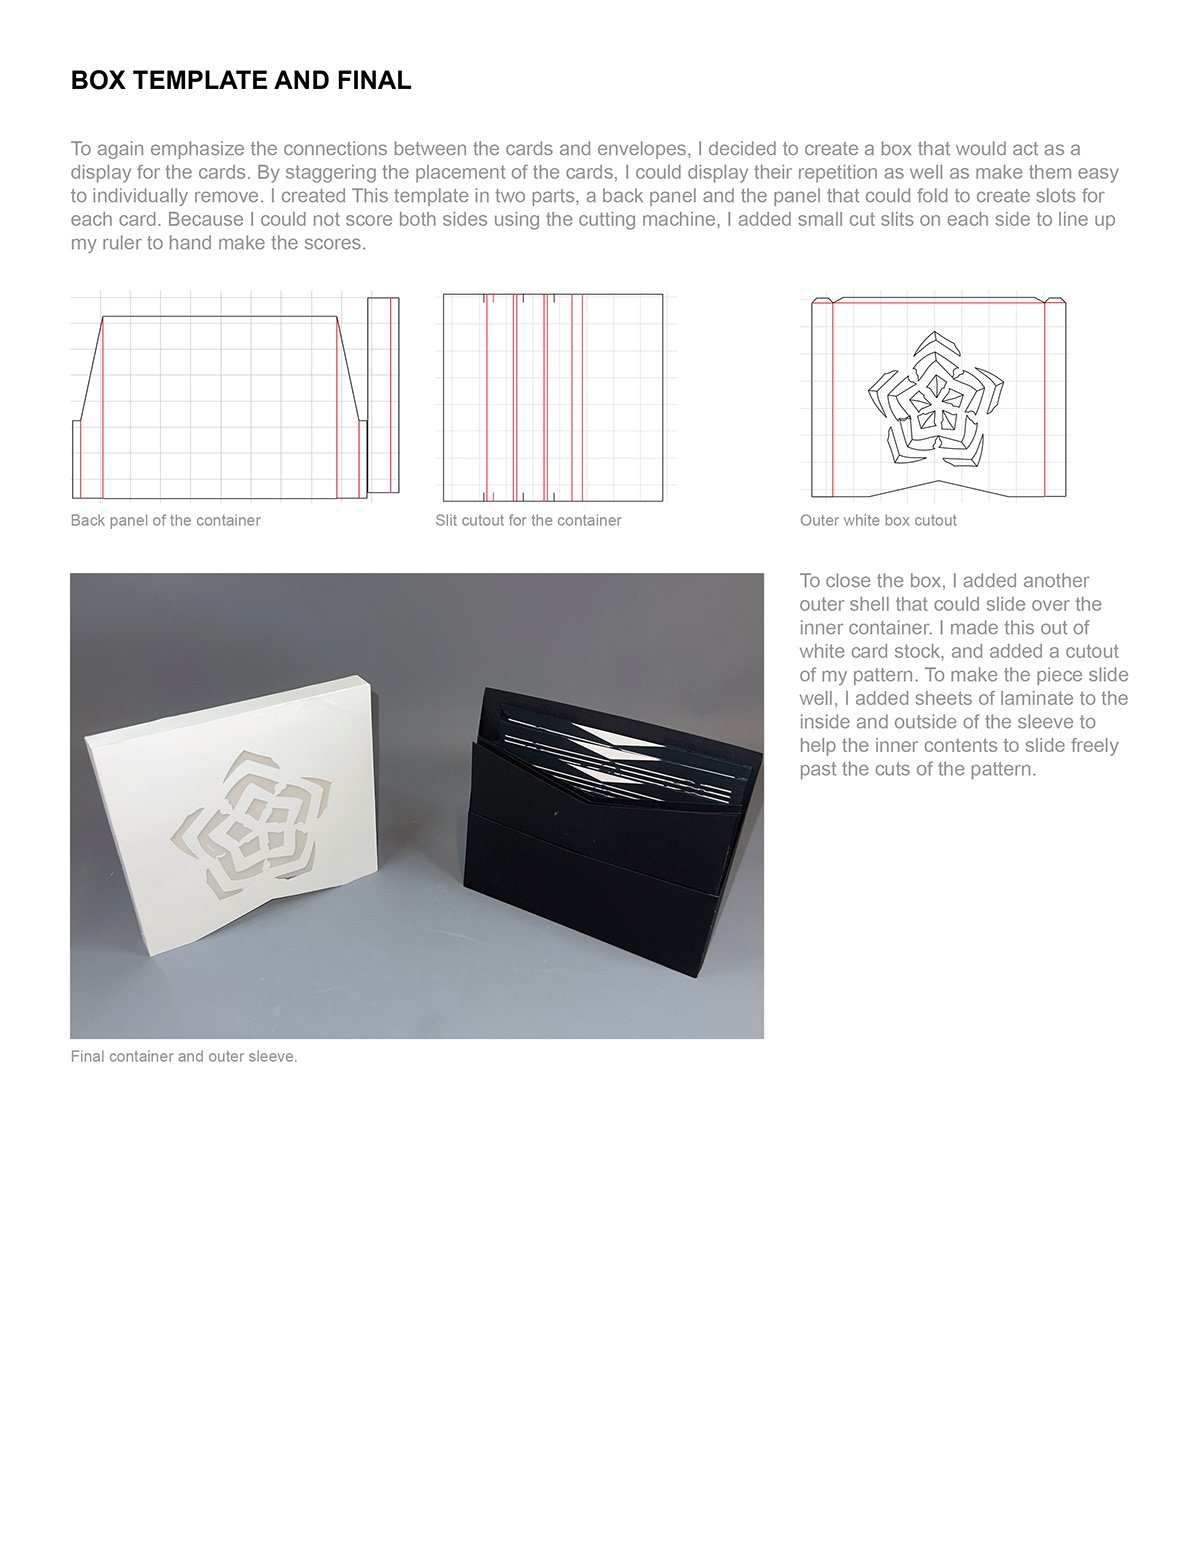
To advance my project, I also decided to create a container for the edition of three cards. Again, I decided to focus on the triangle element of both my cards and envelopes, staggering each individual piece. Each card has their own slot within the box, and the envelopes have space to rest in the front. The main container is made with black card stock, so to contrast this I made an outer box using white card stock, with the flower design cut into it.